Tuesday, April 29, 2014

Buttrick 6018


I finally fished it!  If you read my blog regularly you will know I spoke about procrastination and how hard it was for me to push through and make this particular dress.  However I wanted to wear it for a special event this past weekend and decided to give myself one last push.  This was the result:


Butterick 6018


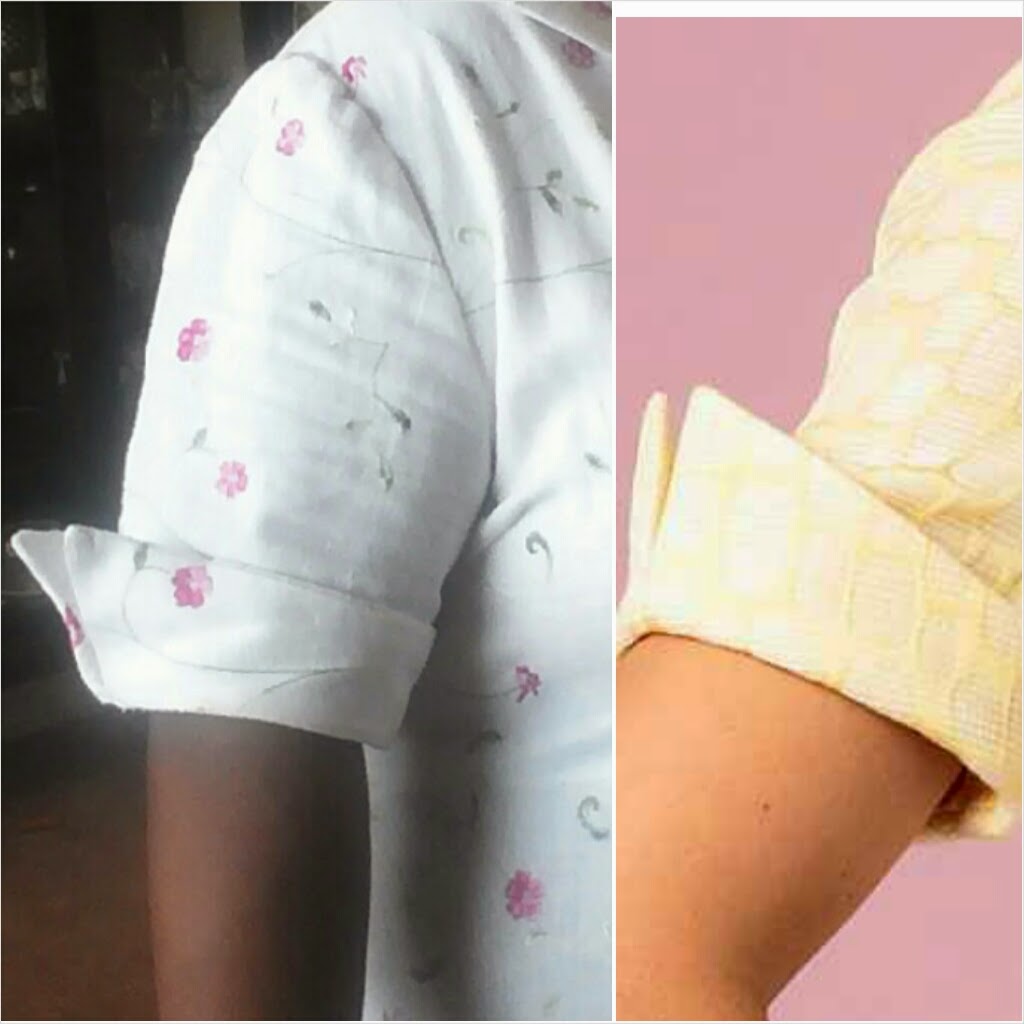
Over all I do like the dress, the main thing that drew me to it where the collar and sleeves:


If you notice my sleeve does not stand as up right as the photo, I think this is due to not using a stiff enough interfacing for the cuffs.  Although I did use the interfacing recommended,  I had to tack the sleeves in place so that they would not droop downward as I moved my arms:


Here is a view of the side:


From the side,  you will see the pattern is design so that the front waist sits higher then the back. giving the look of an empire waist in front yet a mid waist dress from behind. 

Had I notice this feature I would have been a little more hesitant to make it, seeing this look does not necessarily flatter my particular body shape. Don't get me wrong I will continue to wear it ;-)


I also I noticed it shows the difference in weight by a little as 5 lbs.  Losing just that much weight caused the dress to look unfitted on my frame. See below:


 5 lbs before


and


after the 5lbs loss


My overall impression of Butterick 6018 is:

1.  Easy sew for Intermediate sewers, if you are an Advanced Beginner just take your time and follow the steps you should be fine.

2.  If your waist is your tricky spot I would make a muslin first to see any adjustments you may have to make.

3.  Use a coat weight interfacing for the sleeves, or interface all 8 of the cuff pieces with dress weight interfacing (instead of just 4) to give the sleeves a stiffer appearance.

4.  Think of adding side ties if you find it hard to get the waist just right.


TADA!

So let me know what you think, and if you have any suggestions for the sleeves and or waist put them in the comment section below.


Tuesday, April 15, 2014

McCalls 6884


I did it, I finally tackled a knit dress. My project was:


McCalls 6884


I was drawn to this pattern because of a $6 dress that I bought from Cato's awhile back.  Once I wore the knit dress I knew I wanted several more in my collection.  The nice thing about wrap knit dress, not only are they comfortable, with the right accessories, they can become nice semi-formal attire.


Mustering up my courage I gathered my supplies:

Sewing essential for knit fabrics


And selected the an appropriate setting for my sewing machine:

zig zag #4 and 2.5 stitch length


I also choose to use a over stitch foot and I must say, that I like the results using it has given me thus far,

Yeah!


The fabric I used was an ITY that I picked up from Fabric.com, it has a very smooth hand and a wonderful drape.  However, one of the things that I've had to adjust to was the handling of it while I was sewing. 

Although ITY it is often thin in texture I find it weighty when draping from the sewing machine, causing me to develop new technique on how to handle and control the fabric.


With all of that being said this is my result:

My McCalls 6884 :-)

As you can see from the picture I removed the tie ends. No reason, just like the dress better this way :-)

So let me know what do you think, and if any of your seamstress out there have sewing knit tips for me feel free to leave them down in the comment section below.


Tuesday, April 8, 2014

Underneath the surface.....................


Now that Spring has sprung I have decided to take on two new adventure, one of which is to make several dresses with knit fabric and the other is to make:


B5966

When I first saw the pattern, I immediately thought it would be a cute all weather coat to transition into warmer. This is the fabric that I choose:


A bottom weight from Joann's


Although I really like the fabric, it was still a little light weight for a coat.  That's when my Aunt suggested that I underline the back pieces. 

Excellent idea! I've done it once before, why not apply the technique here?  But why underline, you ask?


1.  To make a sheer fabric more opaque...

For example, my first time using underling I used a simple blue cotton fabric to underline a beautiful Georgette print: 


B5450


2.  To give weight and substance to the fabric without adding bulk. 

This would be perfect in the case of the coat, the front pieces are already self lined and interfaced giving them body.  Adding underling to the back pieces, will round out the coat and give it substance.


Going back to Joann's, I bought simple 44" muslin fabric to use as my underling


I made sure I preshrunk the fabric by washing and placing it in the drier, before I cut out the three back pieces of the coat:


Cutting out....


This was my finished result:


Now that I have everything prepared I've started to the process of putting the coat together.  In an upcoming blog, I will show some of the alterations I had to make to the coat and hopefully the finished product.  


In the mean time, if you want to get a more detailed instruction on how to underline garments, Pattern Review has a class on how to do just that called:


Until next Tuesday, remember things are always better then what they seam :-)