Tuesday, September 16, 2014

Autumn Inspirations


Forgive my lack of attention to my blog, I've been real busy the past two weeks with starting a new job, due that fact I haven't had time to review a dress lately.  However, as I was sitting here unwinding after work, I began to think about possible Fall sewing projects when the thought comes to me 'why not share my musing?'.


So without further ado, here are my current 'want-to-sew' patterns for Fall 2014:


Butterick 5030:


Simple woven wrap pattern that I would like make with a tan/gold poplin fabric.  This would be a nice wardrobe building dress that could be easily dressed up/down depending on the occasion.
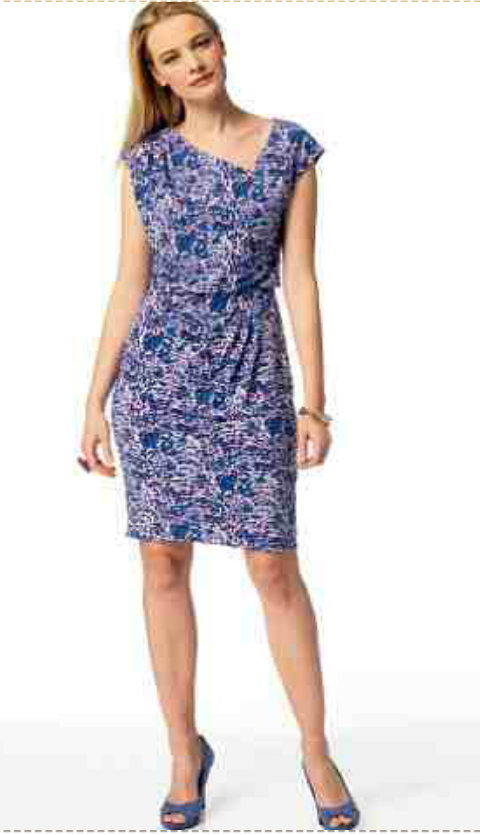


Vogue 8825:


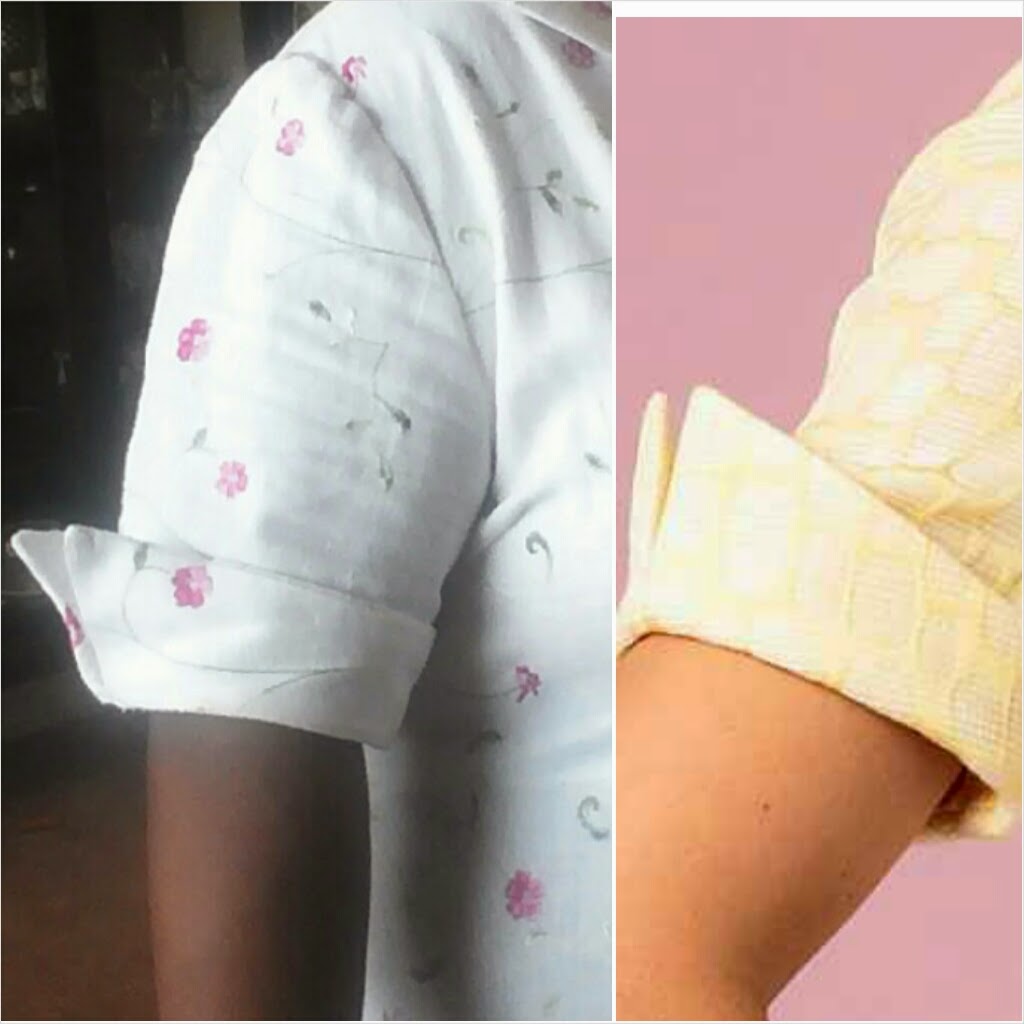
I've posted about the dress before, this time however I think I have the right fabric and courage to make it.  Let's hope to my success.....................


Simplicity 2229:


Every year I like to add at least one new suit to my collection, this year I've focused my attention on this particular pattern.  My desire is to make it in black, that way I can wear an endless variety of blouse that will be well 'suited'.


Vogue 1404 The Ralph Rucci:


The neck line is not my first choice, however the attention to detail makes for a nice challenge and a skill building opportunity.


And last but not least B5966:


This coat has been a thorn in my flesh, why do you ask?  Because although I have cut it out and even wrote a post on how to line the fabric (different from lining), I've still yet to put it all together. Hopefully this will be the fall that I pull it together.


These are just a few of the things that I have sitting by the cutting table, if I plan well and pace myself I hope to review them all for you in the near future. Until then remember every stitch matters.


Tuesday, September 2, 2014

Round Two Vogue 8633


Several years ago during my A line/Retro dress phase, I made the left version of Vogue 8633 in a linen material. Flash forward to the present, I found myself drawn to the pattern again. This time I would use the sheath version to the right.


With this updated version came several construction changes made to the collar. In the original version I followed the instructions below:


 and the result was:


Notice the well shaped edge of the outside collar and the darts in the inside lining.


However, remembering my love/hate relationship with the above process, I decided the side step making the darts in the lining this time around. 

Here's how:


After following the instructions, I used this fabric piece shown above, to cut out the lining piece. With the darts already sewn, it would give the lining fabric the same size and silhouette as the bodice material, without the need to sew the inner darts:


Also notice that the outside collar has a softer shape due to my eliminating the collar facings. I thought it was best to leave them out being that I wanted this dress to be more relaxed. Here are my finshed results below:


Front


Side


I really do enjoy both versions of the pattern. I should also note, unlike the full skirt dress, I eliminated the zipper making this a simple pull over dress. Iron, slide on, and go.


Well that's it, until next time remember nothing is ever as it seams.


Tuesday, August 26, 2014

The Wrong Fold B5871


If you are new to sewing See & Sew from Butterick is a good starting point to learn the bascis of sewing.


Being an experienced sewer these patterns are normally a quick stress free sewing project.

I decided to make view A:


The pattern comes with 4 main pieces simple enough right? Well it would have been if I had followed the recommended fabric layout view:


Instead I did a traditional crosswise fold to the fabric and began cutting out the back pieces. This mistake left too little fabric to cut out the skirt front piece:


I didn't want this to become what sewers call a wadder, so I cut the skirt back piece on the fold once more to use it in place of the front skirt piece.


Front and back skirt pieces


Sorry to say it caused me to lose the pretty gathers in the skirt, yet and still it would end up being a wearable dress :-)

Here are my results:


Once I put the dress together I noticed that accross the back had a slight gap between the shoulders. I decided to place two small darts to each side of the back:


The dart could have been put in cleaner, however I simply wasn't concerned at the time. I was more focussed on the over all look of the dress, besides if you don't tell who will know? ;-)


In harmony with exposing my fabric cutting mistake, here are some of my picture out takes as well:


Pregnant?, full? And just plan goofy


So what mistakes have you made in your over confidence or lack of attention? Let me know in the comments below.


Monday, August 18, 2014

Better Then Advertised Vogue 8898

Have you ever sighed looking at a pattern because the photo of the dress didn't excite you? I call them 'passer's'.


 One such pattern for me was Vogue 8898:


However, one day while I was glancing over dress reviews on Pattern Review.com, I noticed a very cute dress. Clicking on the review, I was amused to learn its true identify, and I thought 'this is what I get for not looking closer at the line drawing below':


After reading the reviews I thought why not give it a try. I decided to use a pretty Fuchsia Rayon Lycra knit that I found at Joanna's on clearance for $3 a yard. I thoght 'If all else failed I can use the left over material to make a top'. 


Here are my results:


I must say I found that the pattern, style and fit made for a very comfortable wear, not to mention a flattering fit for my shape.


I will give a word of caution thou, the pattern runs large and I ended up sizing down two sizes. Outside of that the pattern is truely beginner friendly so much so I have no other insights to give.

For something that I passed over as a so-so pattern, I can happyly say this will go down as one of my favorites.


So what pattern have you passed over only to back track and take a second look?


Tuesday, August 12, 2014

Sheseams' Facebook Page


"What about your blog?" 

I do love my blog, and it will continue to use it for in-deep reviews of patterns or techniques that I have used in my sewing journey. And there is where the differences lye, with a blog, it takes time and forethought in order to present information in an insightful and informative way. Whereas with a Facebook page, I can simply share 'snippets' of information, flashes of inspiration that may run across my mind.


"Don't you have a personal Facebook page?"  

Yes I do, however one thing that irritates me about Facebook is when I get inundated with post after post of a particular subject that I may or more then likely have no interest.  I do not want to cause the same 'irritation' to others.  I am aware that some have an interest in my work as a seamstress, however am sure many could 'due without it'.  With a interest specific page, those that are interested can 'Like' the page and follow, others can be spared :-)


What you can expect

As I stated before, my post will be snippets of information, a sewing pattern that I have an interest, a quick pic of my sewing progress, etc. When new seasonal patterns are released, I would more then likely post 'oh this is nice' or 'hum maybe this one, what do you think?'

For example every year I attend Regional Assemblies, one of thing that I look forward to is the selecting of sewing patterns and fabric that I will use for the weekend wardrobe I wish to wear for the event.

Join the madness!

I remember when I was small and drew a picture at school, I wanted nothing more then to come home and place it on the refrigerator door, it brought me joy to share with others something I had created. This is no different, think of it as my cyber'refrigerator door' a place you can come and take a peak.  As a matter of fact, I would love for you to also post your creations/ideas as well. Hopefully this will become an enjoyable experience and a wholesome outlet for my self-expression.

Until next time I'll continue to keep my self together one stitch at a time.

Wednesday, May 28, 2014

Side Job


Sorry I haven't posted anything in a couple of weeks, it is due to having a sewing project I came across a week ago.

I was applying for a seamstress job at a local Laundromat, although they did not need help at the time one of the seamstress told of a place I could apply.  The place is a packing and sorting company that pays by the piece for ones to sew labels on clothing.  I thought "oh yes that would be nice."

The good

I was able to bring my work to my home and could decided how much I wanted to take on.  It is nice to be able to control your scheduled and pace, not to mention the comfort of home.   


The not so good

I have worked in a similar position before, however in that position, I did not have to also refold and pack the piece of clothing back into it package. In this position i have to not only sew on the labels I have to individual pack and unpack each piece of clothing.  Due to this the work I thought would take me but so much time has taken me twice as much time.  

The other that I thought would be good, taking my work home, is a double edge sword.  How could that be you say, well I have to pack and unpack 30 lbs boxes out of my car and carry them up in a elevator to my apt (which is on the 4th) floor.  To do this I have used a grocery store cart we keep in our apartment building, hey it works LOL.

Choices

I tell you all of this to let you know that I have not forgotten you, I have been however very busy trying to make some extra income.  How long will this last? So far its is temporary and should be over this week, however if they have more work I have to decided if I will take it on and how much of it I can modestly accomplish. These are the things that I am considering:

1.  Time it takes from my own personal sewing
2.  Other family and social obligations that I have
3. The demand I get from the company can you do "a few more boxes?"
4. The stress it puts on my aching shoulders (arthritis) from the repetitive folding of the garments.
5. Is the money worth it?  $10 an hour but it is a labor job, am a office worker by trade.
6. blah blah blah

So there it is my excuse for not updating my blog with a new and interesting sewing adventure.  I guess this could be considered one thou huh?  Hopefully I will have answered the above questions and I will share with you the answer in next weeks blog post.  Until then, I'll keep sewing away and lurking on Pattern Review, jealous I can't finish my cute little dress and post them to the Review Gallery too :-)


Tuesday, May 13, 2014

Blog updates!


Greetings!

Today's post will be about up dates to my blog and how you can get the most out of what you read.


Blog post
(broken down into 3 categories)


Commentary:  

These post will talk about  new ideas, neat finds, and how sewing  helps me to learn more about myself.


Previews: 

These will often be about a current project that I am sewing, the good, bad, and silly mistakes I have made along the way.


Reviews:

These are in depth explanation of reviews I have made on Pattern Review. com


Side Bar!


Note:

This section is where I will put brief messages, i.e. what to expect in the next blog post.


Welcome/About Me:  

Just that!


At the Machine:  

This will be my current project often times being the subject of a 'Preview' post.


Material Being used: 

Shown to spark your curiosity and anticipation


Next up!:  

What I am thinking about making after my current project, I've already taken it out of the envelope and altered the pattern. Now just deciding what fabric choice to make.........


Down the Road!: 

This pic my change from week to week depending on my mood and what direction I wish to take with my sewing. It could be a current pattern I have or one I wish to purchase.


Blog Archive/ Labels:

This section will be broken down by month, listing each post in order that it was published. Look here to easily fine older reviews or misc post you may have missed or would like to review again.


In conclusion 


Hopefully you will find the new updates enjoyable. So grab a cup of coffee, and take a few minutes to share in my adventures, as I keep myself together one stitch at a time.


Wednesday, May 7, 2014

Vogue 1250


I am at my laptop trying to think of a good introduction for my review of Vogue 1250:


Vogue 1250

I mean, what new insight could I bring to a dress that has been a fan favorite on Pattern Review for sometime?  

Could I talk about the simple yet flattering design, could I mention how few pieces are used, oh I know maybe how few alterations I needed to make in-order to get a good fit? 

Once thing is true, this is a very good dress if your are just starting with knit fabric, actually this is the first dress I made using a knit. Oh did I mention the fabric..... that's it Ill talk about the fabric.


Ah the fabric:


Reminds me of Ladybugs! :)


The fabric was a gift from my best friend who purchased it when we went shopping at Mood Fabrics during one of our NY trips.  

The first time I saw it, I caught my self saying OOH out loud, then I vaguely heard myself mumbling softly, 'wow, nice, wonderful, pretty,' as I petted the material affectionately.

Seeing how beautiful I thought the fabric was, and it being a gift from my BFF, I was paranoid not to make a mistake.  I needed and wanted something goof proof LOL.  That's when I decided to turn what you see above into:


DKNY's V1250


As it has been stated in other PR review's, the dress is very flattering to most body types:


So that's it, my first love affair with a knit fabric, a review I should have done sooner, none the less my secret is out now.


shhh, between you and me, me like :)


Keeping myself together one stitch at a time..........


Tuesday, April 29, 2014

Buttrick 6018


I finally fished it!  If you read my blog regularly you will know I spoke about procrastination and how hard it was for me to push through and make this particular dress.  However I wanted to wear it for a special event this past weekend and decided to give myself one last push.  This was the result:


Butterick 6018


Over all I do like the dress, the main thing that drew me to it where the collar and sleeves:


If you notice my sleeve does not stand as up right as the photo, I think this is due to not using a stiff enough interfacing for the cuffs.  Although I did use the interfacing recommended,  I had to tack the sleeves in place so that they would not droop downward as I moved my arms:


Here is a view of the side:


From the side,  you will see the pattern is design so that the front waist sits higher then the back. giving the look of an empire waist in front yet a mid waist dress from behind. 

Had I notice this feature I would have been a little more hesitant to make it, seeing this look does not necessarily flatter my particular body shape. Don't get me wrong I will continue to wear it ;-)


I also I noticed it shows the difference in weight by a little as 5 lbs.  Losing just that much weight caused the dress to look unfitted on my frame. See below:


 5 lbs before


and


after the 5lbs loss


My overall impression of Butterick 6018 is:

1.  Easy sew for Intermediate sewers, if you are an Advanced Beginner just take your time and follow the steps you should be fine.

2.  If your waist is your tricky spot I would make a muslin first to see any adjustments you may have to make.

3.  Use a coat weight interfacing for the sleeves, or interface all 8 of the cuff pieces with dress weight interfacing (instead of just 4) to give the sleeves a stiffer appearance.

4.  Think of adding side ties if you find it hard to get the waist just right.


TADA!

So let me know what you think, and if you have any suggestions for the sleeves and or waist put them in the comment section below.


Tuesday, April 15, 2014

McCalls 6884


I did it, I finally tackled a knit dress. My project was:


McCalls 6884


I was drawn to this pattern because of a $6 dress that I bought from Cato's awhile back.  Once I wore the knit dress I knew I wanted several more in my collection.  The nice thing about wrap knit dress, not only are they comfortable, with the right accessories, they can become nice semi-formal attire.


Mustering up my courage I gathered my supplies:

Sewing essential for knit fabrics


And selected the an appropriate setting for my sewing machine:

zig zag #4 and 2.5 stitch length


I also choose to use a over stitch foot and I must say, that I like the results using it has given me thus far,

Yeah!


The fabric I used was an ITY that I picked up from Fabric.com, it has a very smooth hand and a wonderful drape.  However, one of the things that I've had to adjust to was the handling of it while I was sewing. 

Although ITY it is often thin in texture I find it weighty when draping from the sewing machine, causing me to develop new technique on how to handle and control the fabric.


With all of that being said this is my result:

My McCalls 6884 :-)

As you can see from the picture I removed the tie ends. No reason, just like the dress better this way :-)

So let me know what do you think, and if any of your seamstress out there have sewing knit tips for me feel free to leave them down in the comment section below.


Tuesday, April 8, 2014

Underneath the surface.....................


Now that Spring has sprung I have decided to take on two new adventure, one of which is to make several dresses with knit fabric and the other is to make:


B5966

When I first saw the pattern, I immediately thought it would be a cute all weather coat to transition into warmer. This is the fabric that I choose:


A bottom weight from Joann's


Although I really like the fabric, it was still a little light weight for a coat.  That's when my Aunt suggested that I underline the back pieces. 

Excellent idea! I've done it once before, why not apply the technique here?  But why underline, you ask?


1.  To make a sheer fabric more opaque...

For example, my first time using underling I used a simple blue cotton fabric to underline a beautiful Georgette print: 


B5450


2.  To give weight and substance to the fabric without adding bulk. 

This would be perfect in the case of the coat, the front pieces are already self lined and interfaced giving them body.  Adding underling to the back pieces, will round out the coat and give it substance.


Going back to Joann's, I bought simple 44" muslin fabric to use as my underling


I made sure I preshrunk the fabric by washing and placing it in the drier, before I cut out the three back pieces of the coat:


Cutting out....


This was my finished result:


Now that I have everything prepared I've started to the process of putting the coat together.  In an upcoming blog, I will show some of the alterations I had to make to the coat and hopefully the finished product.  


In the mean time, if you want to get a more detailed instruction on how to underline garments, Pattern Review has a class on how to do just that called:


Until next Tuesday, remember things are always better then what they seam :-)